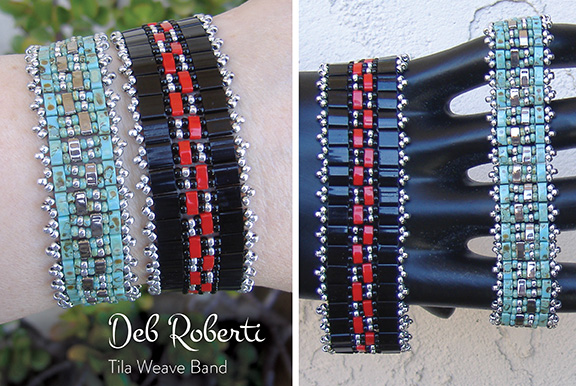
Tila Weave Band
For Tila bead lovers, an easy bracelet made from size 11/0 Miyuki rocaille seed beads and Miyuki Tila beads!
MATERIALS
(for a 6.75-inch bracelet, not including clasp)
• 4-5 yards of 6 lb. FireLine
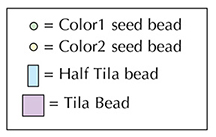
• About 225 Color1 size 11/0 Miyuki rocaille seed beads
• About 275 Color2 size 11/0 Miyuki rocaille seed beads
• About 33 Miyuki Half Tila beads
• About 66 Miyuki Tila beads (or some more Half Tila beads like I used for the turquoise and silver version)
• clasp

Step 1: Thread your needle with a length of FireLine that you feel comfortable working with and add more as you need it.
Leaving about a 14-inch tail for attaching the clasp, go through the bottom hole of a Tila bead.
String a Color1 seed bead, a Color2 seed bead and a Color1 seed bead. Go through the bottom hole of a Half Tila bead. String a Color1 seed bead. Go through the bottom hole of another Tila bead:
NOTE: You will not be making a knot until Step 5 so keep the tension tight and hold onto this tail thread for now.
Step 2: String three Color2 seed beads, go around and through the top hole of the Tila bead that you just exited (highlighted in RED):
Step 3: String a Color1 seed bead and go across through the top hole of the Half Tila bead that you added in Step 1 (highlighted in RED):
Step 4: String a Color1 seed bead, a Color2 seed bead and a Color1 seed bead. Go across through the top hole of the Tila bead that you added in Step 1 (highlighted in RED):
Step 5: String three Color2 seed beads. Grab your tail thread and tie a tight double knot:
Step 6: Go around through the beads highlighted in RED so that you are exiting from the top hole of the left-most Tila bead:
You’ve just completed Row 1.
Step 7: To start Row 2, string a new Tila bead.
Go around and back across through the top hole of the Tila bead that you just exited (highlighted in RED):
Step 8: Go back across through the bottom hole of the Tila bead that you just added (highlighted in RED):
Step 9: String a Color1 seed bead, a Half Tila bead, a Color1 seed bead, a Color2 seed bead, a Color1 seed bead and a Tila bead:
Step 10: Go around and across through the top hole of the Tila bead in the row below (highlighted in RED).
Continue around and across through the bottom hole of the Tila bead that you added in the last step (highlighted in RED):
Step 11: Repeat the last step:
Step 12: String three Color2 seed beads.
Go across through the top hole of the Tila bead that you just exited (highlighted in RED):
Step 13: String a Color1 seed bead, a Color2 seed bead and a Color1 seed bead.
Go across through the top hole of the Half Tila bead that you added earlier (highlighted
in RED):
in RED):

Step 14: String a Color1 seed bead and go across through the top hole of the left-most Tila bead in this row (highlighted in RED):
Step 15: String three Color2 seed beads.
Go around through the beads highlighted in RED so that you are exiting from the top hole of the left-most Tila bead:

You’ve just completed Row 2.
Step 16: To start Row 3, string a new Tila bead.
Go around and back across through the top hole of the Tila bead that you just exited (highlighted in RED):

Step 17: Go back across through the bottom hole of the Tila bead that you just added (highlighted in RED):

Step 18: String a Color1 seed bead, a Color2 seed bead, a Color1 seed bead, a Half Tila bead, a Color1 seed bead and a Tila bead:

Step 19: Go around and across through the top hole of the Tila bead in the row below (highlighted in RED).
Continue around and across through the bottom hole of the Tila bead that you added in the last step (highlighted in RED):

Step 20: Repeat the last step:

Step 21: String three Color2 seed beads.
Go across through the top hole of the Tila bead that you just exited (highlighted in RED):

Step 22: String a Color1 seed bead.
Go across through the top hole of the Half Tila bead that you added earlier (highlighted
in RED):
in RED):

Step 23: String a Color1 seed bead, a Color2 seed bead and a Color1 seed bead.
Go across through the top hole of the left-most Tila bead in this row (highlighted in RED):

Step 24: String three Color2 seed beads.
Go around through the beads highlighted in RED so that you are exiting from the top hole of the left-most Tila bead:

You’ve just completed Row 3.
Step 25: Repeat Step 7 to Step 24 (Row 2 and 3)—ending with a repeat of either Step 15 or Step 24—until your band is the length you want it, minus about a half-inch and the length of your clasp:

Step 26: To attach one end of the clasp, go back around through the beads highlighted in RED so that you are exiting out of the Color1 seed bead next to the top right-most Tila bead:

Step 27: String two Color1 seed beads and a Color2 seed bead.
Go through the clasp and then back down through the Color2 seed bead that you just strung:

NOTE: To make your band longer, just add more beads than directed in this step and the next.
Step 28: String two more Color1 seed beads.
Go back around through the beads highlighted in RED:

Step 29: Go back around through the beads highlighted in RED and the clasp several times:

Weave back into the bracelet, knot in several places and then cut your thread.
Step 30: To attach the clasp to the other end of your bracelet, thread your needle with the tail thread from Step 1.
Go across through the beads highlighted in RED:


