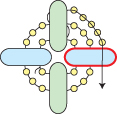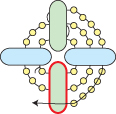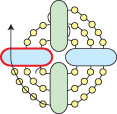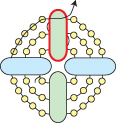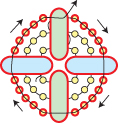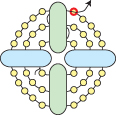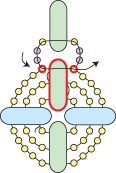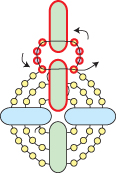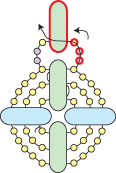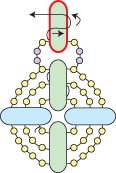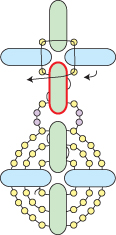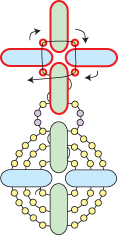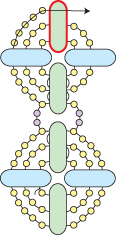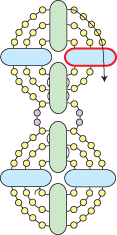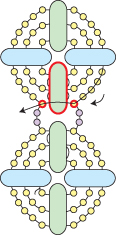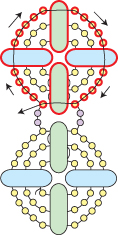
Trapezium Bracelet & Earrings
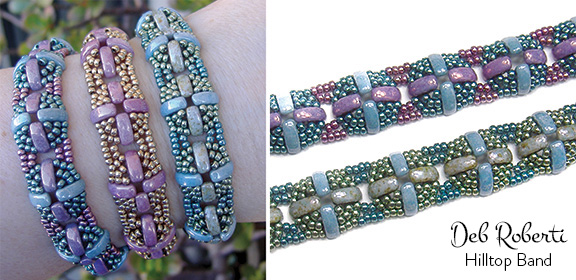
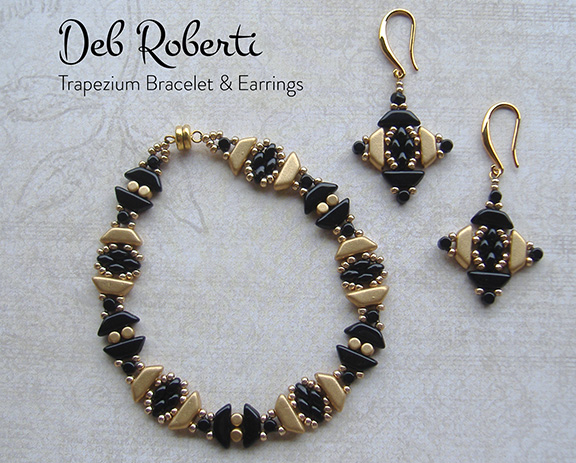
Free bracelet and earring pattern for the new Tinos Par Puca beads—two-hole trapezoid-shaped Czech beads designed by the French company, Les Perles Par Puca.
MATERIALS: Bracelet
(for a 7-inch bracelet, not including clasp)
• About 2.5 yards of 6 lb. FireLine
• About 125 size 11/0 seed beads
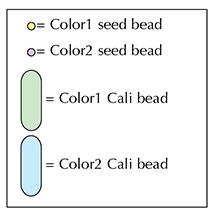
• About 11 Color1 size 3mm beads (can be any type of size 3mm beads—Minos® Par Puca®, size 8/0 seed beads, round beads, etc.)
• About 10 Color2 size 3mm beads (again, any type of 3mm beads)
• About 20 MiniDuo beads
• About 10 Color1 Tinos® Par Puca® beads (referred to as Tinos beads within the Step text)
• About 10 Color2 Tinos® Par Puca® beads
• clasp
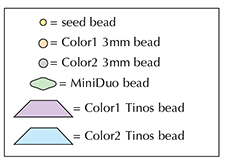
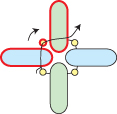
Step 1: Thread your needle with about 2.5 yards of FireLine (or start with a length that you feel comfortable with and add more later).
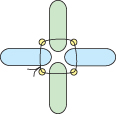
Leaving about a 10-inch tail for attaching the clasp, string a seed bead, a Color1 3mm bead and a seed bead. Go through the right hole of a Color1 Tinos bead.
String a seed bead, three MiniDuo beads and a seed bead. Go through the right hole of another Color1 Tinos bead:

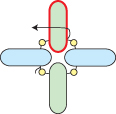
Step 2: While still hold your tail thread, string a seed bead, a Color1 3mm bead and a seed bead.
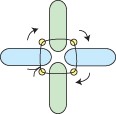
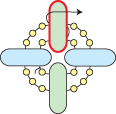
Go around and down through the left hole of the Color1 Tinos bead that you just exited (highlighted in RED):

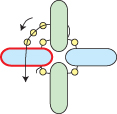
Step 3: String a seed bead and go down through the left hole of the top MiniDuo bead (highlighted in RED):

Step 4: String a MiniDuo bead and go down through the left hole of the bottom MiniDuo bead (highlighted in RED):

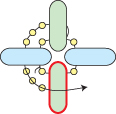
Step 5: String a seed bead and go down through the left hole of the first Color1 Tinos bead (highlighted in RED).
Grab your tail thread and tie the beads together with a tight double knot:

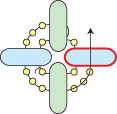
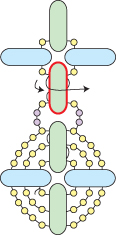
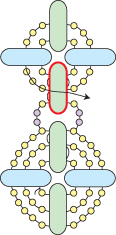
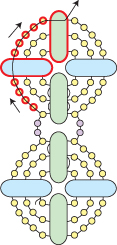
Step 6: Go around and back through the seed bead, the Color1 3mm bead, the seed bead, the right hole of the Color1 Tinos bead and the seed bead highlighted in RED:

Step 7: String two seed beads.
Go up through the right hole of the middle MiniDuo bead highlighted in RED:

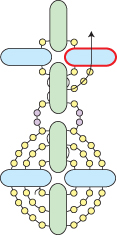
Step 8: String two seed beads.
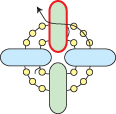
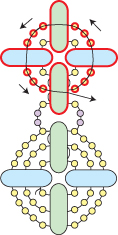
Go back up and around through the seed bead, the right hole of the Color1 Tinos bead, the seed bead, the Color1 3mm bead, the seed bead, the left hole of the Color1 Tinos bead and the seed bead highlighted in RED:

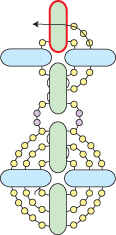
Step 9: String two seed beads.
Go down through the left hole of the middle MiniDuo bead highlighted in RED:

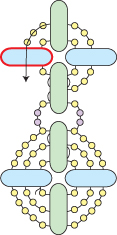
Step 10: String two seed beads.
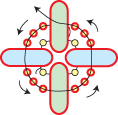
Go back down and around through the seed bead, the left hole of the Color1 Tinos bead, the seed bead, the Color1 3mm bead, the seed bead and the right hole of the Color1 Tinos bead highlighted in RED:

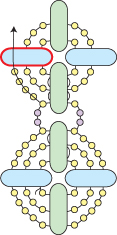
Step 11: Go back up through the beads highlighted in RED:

Step 12: String a seed bead. Go up through the left hole of a Color2 Tinos bead.
String a Color2 3mm bead. Go up through the left hole of another Color2 Tinos bead.
String a seed bead, a Color1 3mm bead and a seed bead. Go around and back down through the right hole of the Color2 Tinos bead that you just added:

Step 13: String a Color2 3mm bead.
Go down through the right hole of the first Color2 Tinos bead (highlighted in RED):

Step 14: String a seed bead.
Go across through the Color1 3mm bead highlighted in RED:

Step 15: Go back around through the beads highlighted in RED:

Step 16: Go back up through the beads highlighted in RED:

Step 17: String a seed bead. Go up through the right hole of a Color1 Tinos bead.
String a seed bead, three MiniDuo beads and a seed bead. Go through the right hole of another Color1 Tinos bead:

Step 18: String a seed bead, a Color1 3mm bead and a seed bead.
Go around and down through the left hole of the Color1 Tinos bead that you just exited (highlighted in RED):

Step 19: String a seed bead and go down through the left hole of the top MiniDuo bead (highlighted in RED):

Step 20: String a MiniDuo bead and go down through the left hole of the bottom MiniDuo bead (highlighted in RED):

Step 21: String a seed bead and go down through the left hole of the Color1 Tinos bead below (highlighted in RED):

Step 22: String a seed bead.
Go around through the Color1 3mm bead, the seed bead, the right hole of the Color1 Tinos bead and the seed bead highlighted in RED:

Step 23: String two seed beads.
Go up through the right hole of the middle MiniDuo bead highlighted in RED:

Step 24: String two seed beads.
Go back up and around through the beads highlighted in RED:

Step 25: String two seed beads.
Go down through the left hole of the middle MiniDuo bead highlighted in RED:

Step 26: String two seed beads.
Go back down and around through the beads highlighted in RED:

Step 27: Go back up through the beads highlighted in RED:

Step 28: Repeat Step 12 to Step 27—ending with either Step 16 or Step 27—until your bracelet is the length you want it, minus about a third-inch and the length of your clasp:

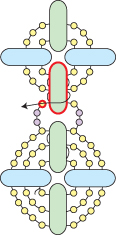
Step 29: To attach one end of your clasp, string three seed beads.
Go through your clasp and then back down through the last (third) seed bead that you just added.
String two more seed beads and go back across through the Color1 3mm bead that you exited at the beginning of this step.
NOTE: If you want to add some length, just add more seed beads or 3mm beads.

Go back around through the beads that you just added and the clasp several times to reinforce your attachment to the clasp.
Weave back into your bracelet, knot in several places and then cut your thread.
To attach your clasp to the other end of your bracelet, thread your needle with the tail thread from Step 1, weave up through the beads and exit from the top-most 3mm bead. Repeat Step 29.
EARRINGS
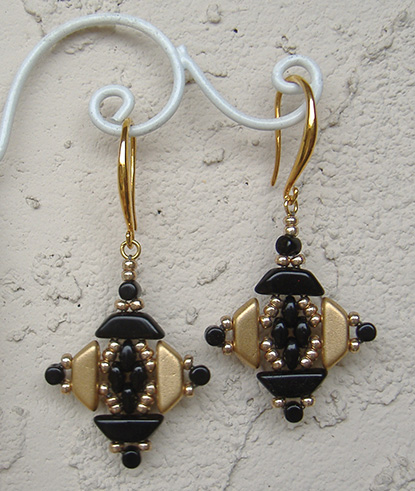
MATERIALS: Earrings
• About 4 feet of 6 lb. FireLine
• About 40 size 11/0 seed beads
• 8 Color1 size 3mm beads (any type of size 3mm beads)
• 8 MiniDuo beads
• 4 Color1 Tinos® Par Puca® beads
• 4 Color2 Tinos® Par Puca® beads
• two small (2-4mm) jump rings
• a pair of earring findings
• About 4 feet of 6 lb. FireLine
• About 40 size 11/0 seed beads
• 8 Color1 size 3mm beads (any type of size 3mm beads)
• 8 MiniDuo beads
• 4 Color1 Tinos® Par Puca® beads
• 4 Color2 Tinos® Par Puca® beads
• two small (2-4mm) jump rings
• a pair of earring findings
Repeat Steps 1-11 but start with about two feet of FireLine and leave a 6-inch tail that you can weave in and make disappear at any time.
Step 12: Flip the motif on its side:

Step 13: Go back through the seed bead, the bottom hole of the Color1 Tinos bead and the three seed beads highlighted in RED:

Step 14: Go through the left hole of a Color2 Tinos bead.
String a seed bead, a Color1 3mm bead and a seed bead.
Go around and up through the right hole of this same Color2 Tinos bead that you just added:
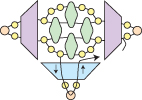
Step 15: Go back around through the three seed beads, the bottom hole of the Color1 Tinos bead, the seed bead, the Color1 3mm bead, the seed bead and the top hole of this same Color1 Tinos bead (highlighted in RED):
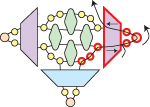
Step 16: Go back across through the threes seed beads highlighted in RED:
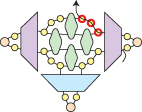
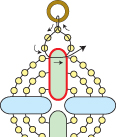
Step 17: Go up through the right hole of a new Color2 Tinos bead.
String a seed bead, a Color1 3mm bead and two seed beads.
Go around through your jump ring and then back down through the two seed beads and the 3mm bead that you just strung:
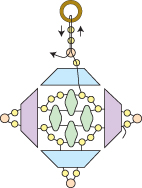
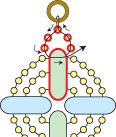
Step 18: String a seed bead. Go down through the left hole of the Color2 Tinos bead, through the three seed beads and across through the top hole of the Color1 Tinos bead highlighted in RED:
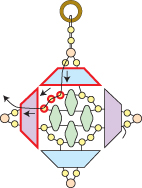
Step 19: Circle back through the beads highlighted in RED:
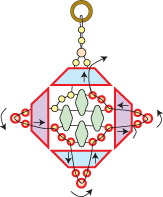
Step 20: Go back around through the beads highlighted in RED and jump ring for reinforcement:


